
Outlook is widely recognized as one of the most widely used desktop email programs due to its user-friendly interface and high level of security. Outlook stores all of its data locally on a PC and uses two file extensions.ost and.pst. However, you will need the PST file if you want to access the Office Storage Table (OST) data on a separate computer when you transfer machines. Simply because Outlook is unable to import the OST file. Thus, I've covered both manual and software methods for converting Outlook OST to PST below.
Techniques for Outlook OST to PST Conversion
The data from Outlook OST files can be migrated into PST format using the procedure below.
- Top OST to PST Conversion
- Convert OST to PST.
- The Wizard for Import and Export
You can use any third-party software or the manual approach to convert the data from the OST file into PST format. You are welcome to utilize one of the two solutions I'm going to describe here: the third-party solution or the manual.
Method 1: Use software to export OST data to PST
I suggest using the DataVare OST to PST converter if Outlook is not functioning or if the Exchange Server is unavailable. Recovering soft-deleted files and restoring corrupted or damaged Outlook OST into PST file format is a professional and simple method.
With just a few simple clicks, the user can export all or a selection of the OST data—including emails, contacts, calendars, tasks, appointments, attachments, and more—as a PST file.
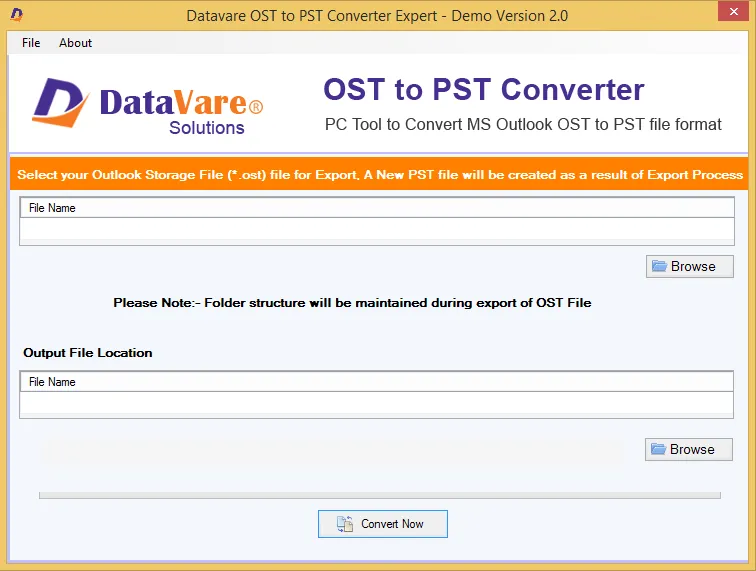
Step 1: Click the Add Button to add the OST file after starting the OST to PST Converter.
Step 2: Choose the export option (file format) from the drop-down list after uploading the OST.
Step 3: Go through the destination path where the exported file is to be saved. >> Export. Now, the data migration and Progress bar display will happen at the same time.
Method 2: Use the Import Export Wizard to convert OST files to PST.
Step 1: Open Outlook and select File from the menu in the upper right corner. Following that, choose the Import/Export option by clicking on Open & Export.
Step 2: Select Export to a file>> Next when a new popup window appears on the screen.
Step 3: Select Outlook Data File (.pst)>> Next after that. Once the export Outlook Data file box has appeared on the screen, select the Include Subfolders option by clicking on the Next button.
Step 4: Navigate to the location where the PST file should be saved in the newly opened window. Press the finish button when you're done.
Method 3: Use the Archive OST to PST procedure to move OST files to Outlook PST.
This is an additional manual procedure that comes with Microsoft Outlook that enables OST to PST migration.
Step 1: Open the OST that you wish to export into an OST by running the specified Outlook.
Step 2: After adding the OST, choose Archive from the File menu's details and mailbox clean-up section
Step 3: Select the date in the Archive things older than an option after checking the box for "Archive this folder and all subfolders." After it's finished, navigate the device's location to save the Archive PST file. In the end, press OK.
Your Outlook OST file was successfully saved in PST file format once the operation was finished.
Note: The following conditions will prevent the above manual process from functioning.
1. The device does not install Outlook
2- There is no exchange server available.
3- The Exchange Server and Outlook are not linked.
4- Outlook isn't operating correctly, etc.
Note: The utility has an extra preview option that lets you migrate Outlook OST data to PST or other formats and view an OST preview.
Read More :- Convert OST to EML converter
Conclusion: I covered every option for manually or with software converting Outlook OST to PST in this essay. It should assist you in exporting the data from the OST file to the PST. Simply fill out the comment box if you still have any questions about this.


